

I had this very unfortunate first try with a pattern I made using a book called Creating historical clothes (2013). There are instructions to make your own stays using your own measurements. It just didn't work out! The main problem was, that the armhole was way too small regardless of what ever I did. So that was a catastrophe. Fortunately I only made one real mock up (the yellow one) and not the real thing.
Sanna was so very kind to let me try her stays, and as they were almost perfect, she lend me the pattern. I got off so easy not to have to make a mock up at all! We just needed to make the pattern 1 cm longer, take 1 cm in from each side of the front panel and I made the shoulder strap approximately 4 cm longer. I also wanted to have front lacing in addition to back lacing. That way the stays would be more easy to put on myself. The pattern was for fully boned 1760's stays.
These were my first stays ever so I needed a lot of instructions. I took my time browsing different blogs. Sanna has a really good instruction series, unfinished though. But nevertheless they were very helpful! I found this post helpful too. I also bought The Guide to: Sewing your own 18th century stays using your custom drafted pattern e-book. I think the photos in the book should be better quality than they are. And I feel like I still needed to use other sources beside the book even though it did have lots of good information and a few invaluable tips. Sanna was very helpful also.

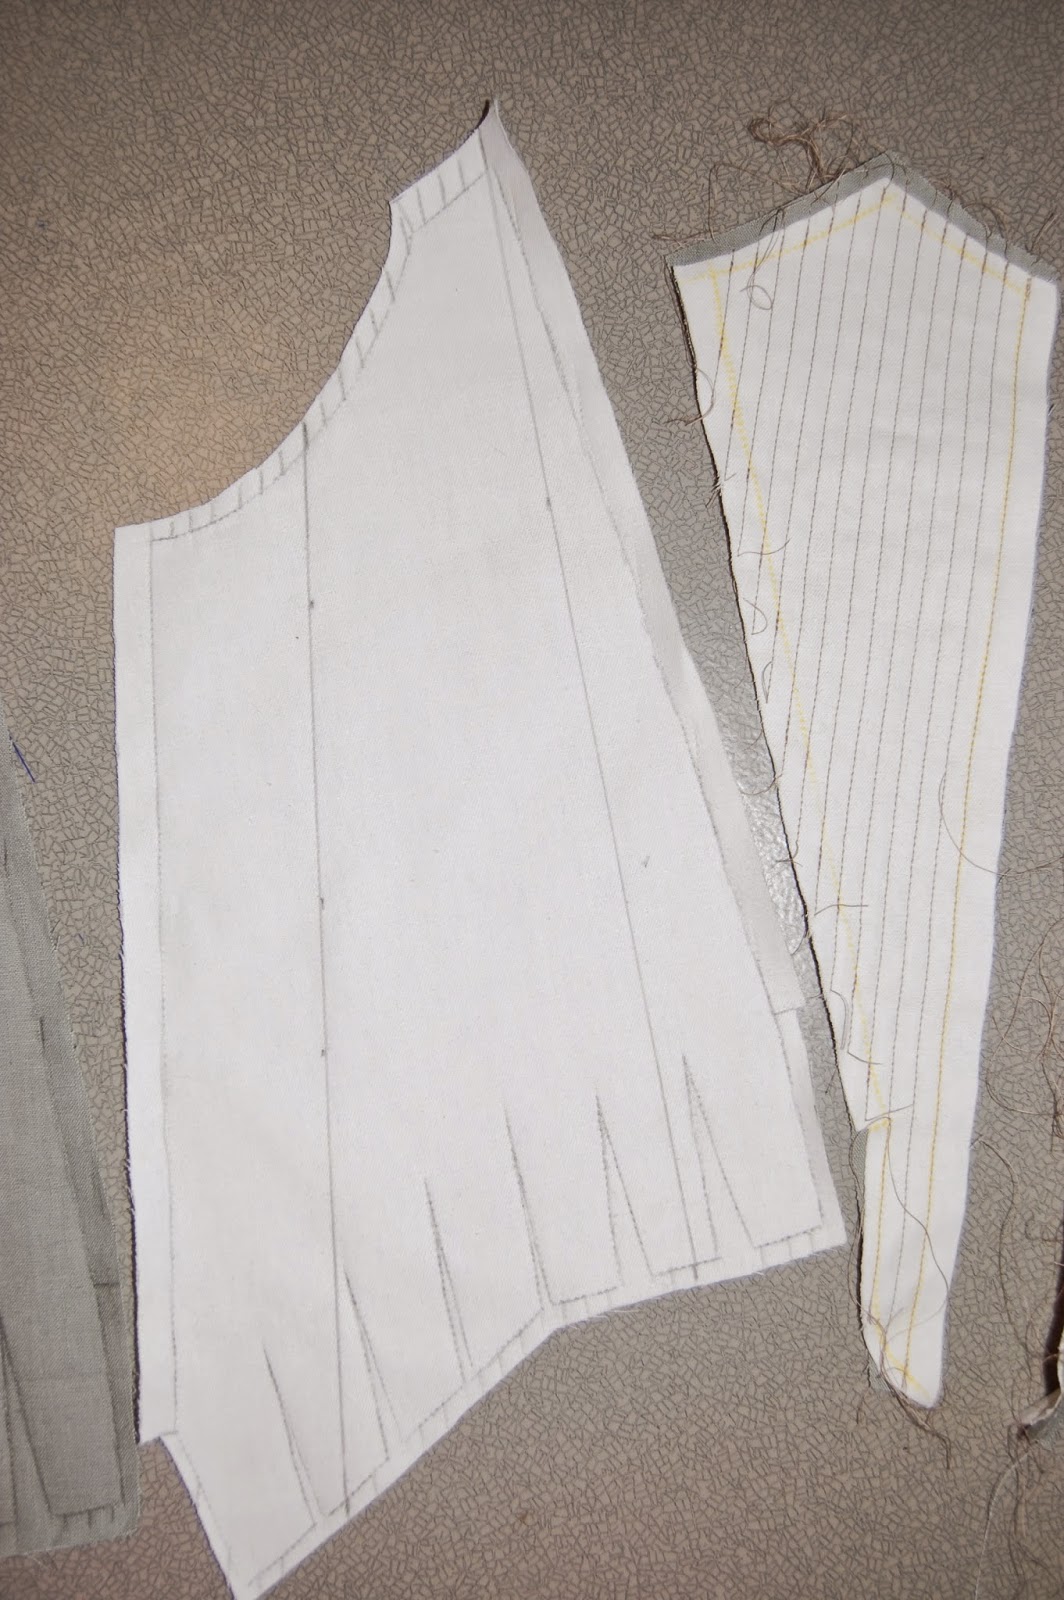
At this point I have already drawn and cut my pieces and sewn some of the bone channels. For some reason I just had to cut some seam allowances everywhere instead of adding them just in side seams :D. It wasn't really necessary but it wasn't a disadvantage either. At least the fabric didn't unravel too much that way. One of the best tips at the guide book I used was to set the needle of my sewing machine so that it automatically sews 0,7 mm from the edge of the sewing foot. That way I didn't have to draw all the lines for channeling. Just some lines do define the angle of the channels. That made things much faster at this point.
I only used one layer of white cotton canvas as interlining which I now regret. I should have used two layers. I had green medium weight linen as my outer fabric and thought it would be sturdy enough. Well, it kinda was but it stretched a lot! The cotton canvas stretched too. That was not good! Now that I have used the stays once I need to make them smaller because I have to fully close them to get them tight enough. Not good. But I'll get to that. I wanted to be as period as it was possible to be in two weeks I had time to make the stays :D. So I used linen and cotton fabrics, cotton thread, linen buttonhole thread and cotton tape. I also sew everything by hand except the boning channels. I wasn't ready for that yet. I might never be ready for that...


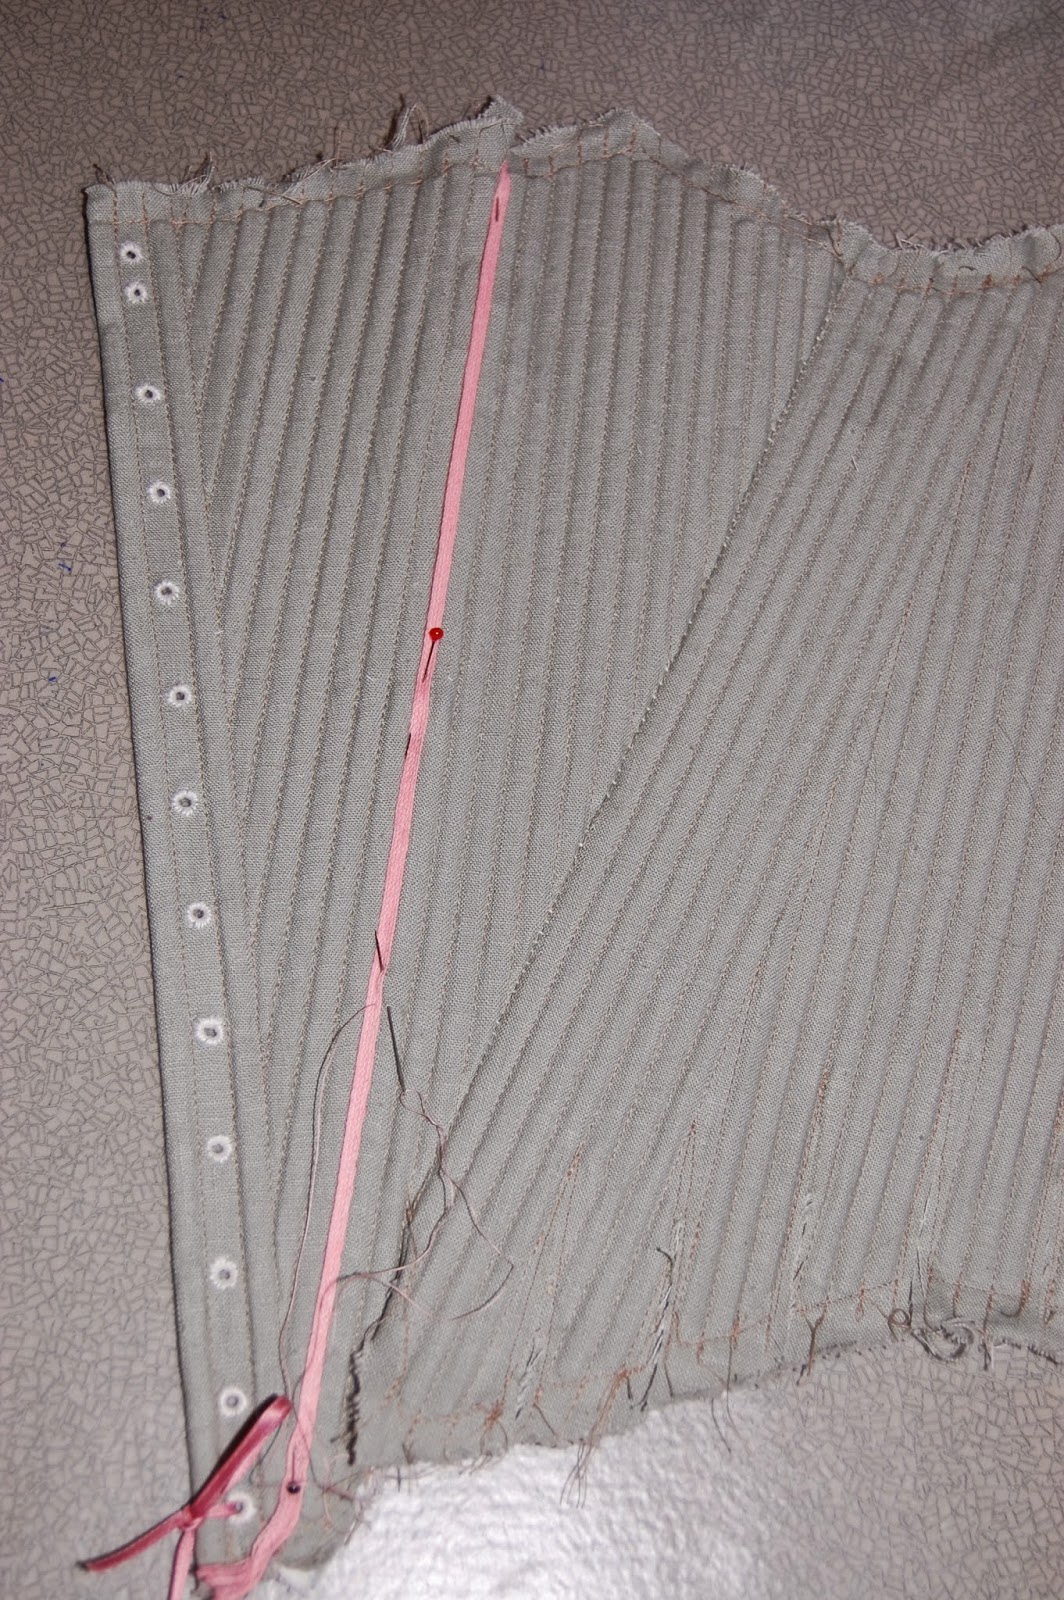
Here I have sewn all the boning channels and put other half of the pieces together. I had real trouble finding information on what stitch to use to sew the pieces together. I ended up using whip stitch which I think is totally period. I highly recommend that you sew from the wrong side. That way it will look neater from the right side. I pressed the seam allowances first and then sew because that's the only way it makes sense ;). I also realized that it would be a great idea to put the boning in at least next to the seams before putting the pieces together. That way I wouldn't accidentally sew trough the outer material and ruin the boning channels right next to the seam.
I used cable ties as my boning. I used about 30 cm long and 0,5 mm wide and 0,8 mm wide for the far edges of lacing. Cable ties work really well. Though I should have gotten longer ones because now I had to tape them together to get long enough boning for the longest parts. At some places you can see that I have used ties taped together. Not period, I should say... I cut the ends as round as possible so that the ties won't came trough the fabric. Some ties needed to be more triangular shape at the end to fit perfectly to the channels. Because I needed to make every bone different this phase took a lot of time. After I got all the pieces together I whip stitched (is that the right name of the stitch?) and attached the seam allowances to the interlining.


Now I was close to get to try my stays on for the very first time! I just needed to make the dreaded eyelets. To be honest I don't quite understand why people think this is the most tiresome phase of stay making. I think this was in fact quite fun and you can see the result pretty fast. I think the boning is much more boring to do. I hadn't done a single eyelet before in my life. Firstly I don't have an awl. So I used a combination of big blunt needle and two different sized screwdrivers. First I marked the holes with pencil. Then I made a small hole with my needle and then enlarged it with my screwdrivers. Then I used my buttonhole linen thread and buttonhole stitch to sew the eyelets. You must have a spiral lacing for all 18th century stays if you want it to be period. Spiral lacing requires a specific placement of the eyelets. You can find more information here for example.
Now I understand why they use polyester thread now days. Linen thread is strong but it frays quite easily. I needed to use the one length of the thread for only one eyelet and take new length for every eyelet. Otherwise the thread would snap. I also understand why they used to wax the thread. I guess I need to get me some of that wax. First I made the buttonhole stitches too dense. When I did less stitches it looked neater.
Then it was time for the first try! The stays fitted pretty well. I only needed to adjust the arm hole from the front by cutting some fabric off. I was pleased.
In these pictures you can see pretty well how the seam sewn with whip stitch between pieces looks like. It's not exactly pretty. Realizing this I understood why there are these tapes used as "decoration" on 18th century stays. They are there to cover the ugly seams!

So I got myself some cotton tape (~ 4mm wide)! In fact Sanna donated some. The problem was that the tape was white and I wanted pink to get at the time very fashionable green and pink color combination. To make things more difficult :D. I needed to dye all the cotton tape I was going to need. Also the tape I was going to use for the binding to get all the tape the same color. I didn't find pink dye so I bought red and started my own laboratory in our kitchen to figure out how much red color I needed to use to make the tape pink. For the record: minimal amount. But I did it! The tape was pink! So I happily ironed the dried up tape and sew the tape on the seams.
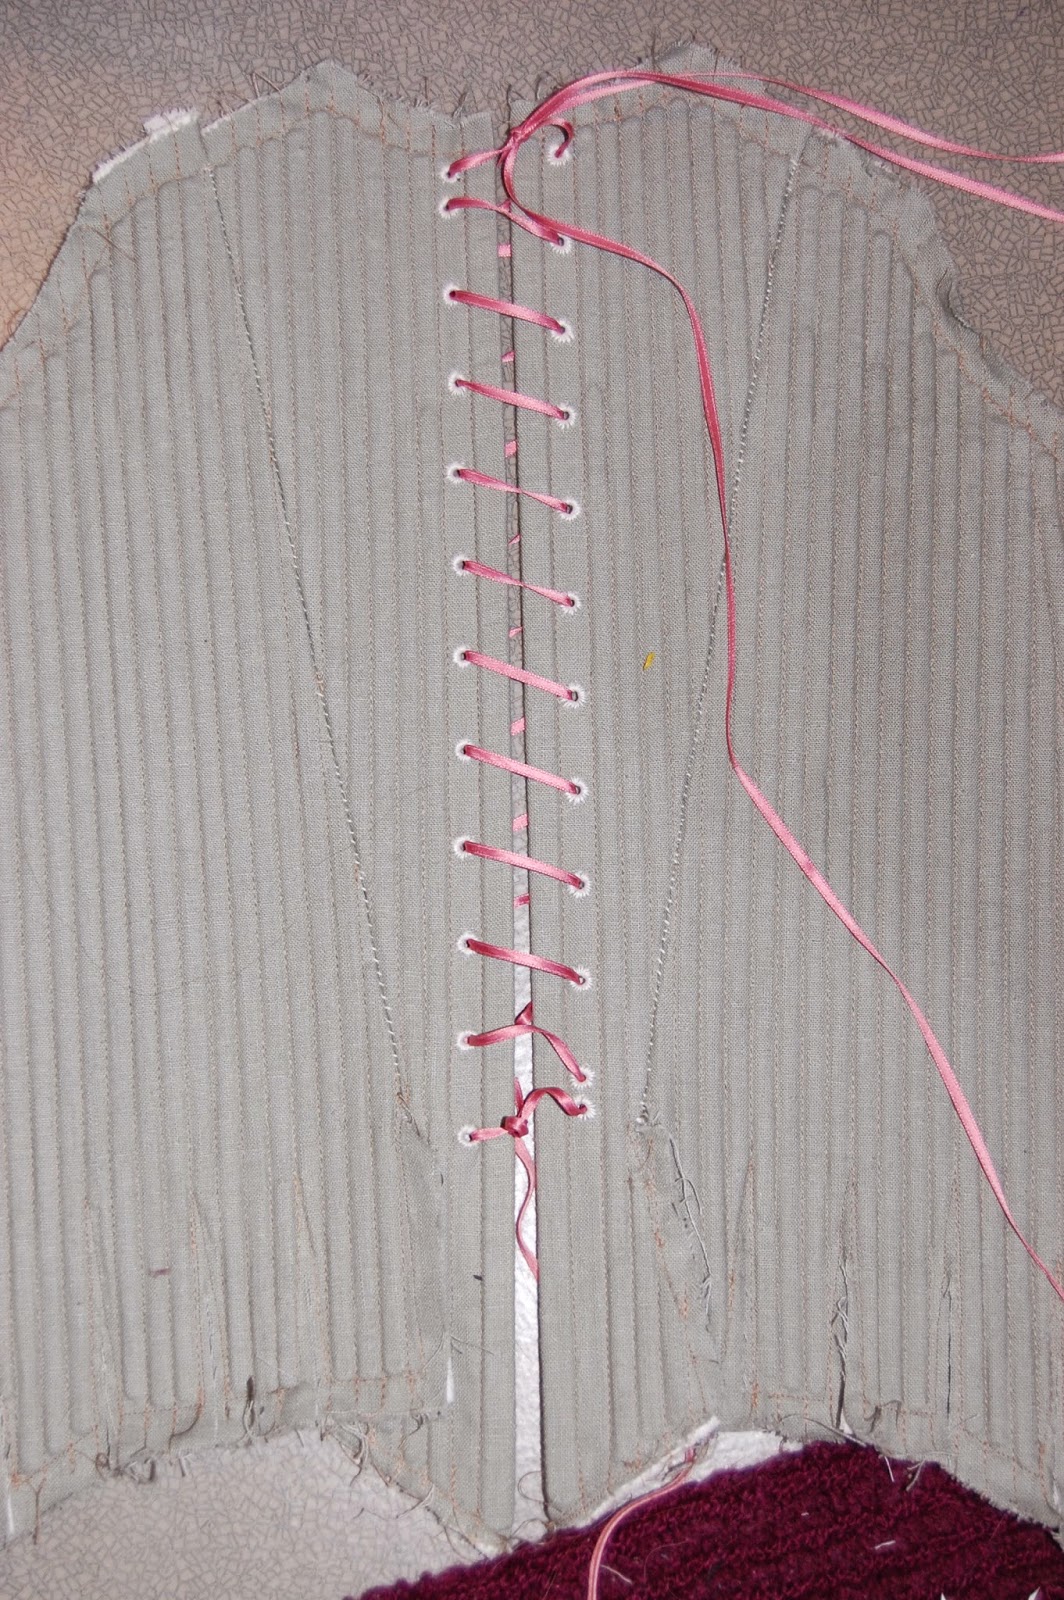

Construction photos...And lacing. Remember to attach the shoulder straps at this point. Use the outer material and the interlining for the straps. The lining is to be added later. I backstitched mine on.


This is not my favorite part. The binding. How to make it? Cut the tabs as closely as possible. Use narrower cotton tape than you think you're going to need. I used about 1 cm wide. Sanna said the narrower tape will look prettier and she was right. I sew the tape first on the right side, turned it to the wrong side and sew on. I'm supposed to cover it all up with lining on the wrong side. The tabs...well, they are not easy. I guess it's a trial and error. But I think I got them looking pretty good for my first try, right?
We had a Christmas ball few weeks ago and that was my time limit. I wanted to have my stays to be at least usable in the ball. At the morning of the ball I was still sewing the binding on :D. Then I run out of the tape. Seriously. I couldn't finish the last 17 cm. But the stays were wearable. There is still no lining, but I'm getting there. The stays were very comfortable and I didn't feel distressed by them at all. Even eating was normal :D. Well, that kinda tells you the stays probably weren't tight enough.
Now I've decided to make the stays smaller which probably isn't such a good idea, but I can always make a new pair... I've taken a few centimeters off front. The stays are ok, but not so surprisingly the back pieces press my shoulders a little bit. But I think I can live with that. You can see the change in one of the photos. Now I just need to cut the bones to fit, finish the binding and finally put on the lining. Then it will be finished.
It was a good experience and now I'm already fantasizing about a half-boned pair of stays...
Part two here.
Part two here.
Ei kommentteja:
Lähetä kommentti